Understanding how to test a Harley Davidson voltage regulator is essential for every motorcycle enthusiast. This component is crucial for maintaining your bike’s electrical system, ensuring it runs smoothly and efficiently. A faulty voltage regulator can lead to electrical issues that may affect performance and safety, ultimately dampening your riding experience.
Many riders may overlook this part during routine maintenance, but knowing how to properly test and assess its functionality can save you time and money on repairs. By mastering this skill, you’ll not only enhance your mechanical know-how but also gain greater confidence on the road. So, if you’re ready to ensure your Harley performs at its best, let’s explore the definitive steps to effectively test your voltage regulator and keep your ride in optimal condition.
How to Identify a Failing Voltage Regulator in Your Harley Davidson
Identifying a failing voltage regulator in your Harley Davidson is essential to maintaining your bike’s electrical system, ensuring its longevity and performance. The voltage regulator plays a critical role in managing the electrical current produced by the motorcycle’s charging system, which prevents overcharging or undercharging the battery. When this component begins to fail, your bike may exhibit various warning signs that shouldn’t be overlooked.
One of the first indicators of a malfunctioning voltage regulator is an inconsistent headlight brightness. If you notice that your headlights flicker or dim while riding, it may signal voltage fluctuations caused by a failing regulator. Additionally, battery issues often surface as the regulator struggles to maintain a stable charge level. If you find that your battery frequently dies or requires jumping, the voltage regulator could be the culprit. Overheating is another red flag; if the regulator becomes excessively hot to the touch, it’s critical to investigate further.
Monitoring the voltage readings at the battery terminals can provide quantitative evidence of a regulator’s health. Using a multimeter, measure the voltage when the bike is off and then when it is running. A healthy regulator typically outputs between 13.5 to 14.5 volts when the engine is at idle. Significant deviations from this range could indicate a problem. Implementing these strategies not only empowers you to address potential issues early but also enhances your understanding of your motorcycle’s electrical system, bolstering both safety and performance on the open road.
Essential Tools for Testing Your Harley Davidson Voltage Regulator
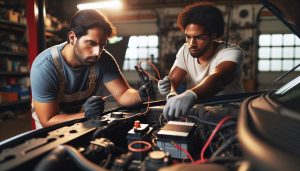
To accurately diagnose a failing voltage regulator in your Harley Davidson, having the right tools is paramount. A well-equipped toolbox not only simplifies the troubleshooting process but also enhances your ability to evaluate and repair electrical issues efficiently.
One of the essential tools for testing your voltage regulator is a digital multimeter. This device allows you to measure voltage, current, and resistance, providing a comprehensive analysis of the electrical system. When testing the voltage regulator, you’ll specifically use the multimeter to record the voltage output at the battery. Ideally, with the engine running, your readings should fall between 13.5 to 14.5 volts.
In addition to a multimeter, you may also want a wrench set and screwdrivers for removing the regulator. As you might encounter corrosion or tight connections, having these basic hand tools at your disposal will enable you to access and replace components without hassle.
For more advanced diagnostics, consider investing in an oscilloscope. While this tool is more specialized, it can provide a visual representation of voltage fluctuations over time, helping you identify erratic behavior that might not show up with a multimeter. Furthermore, having access to a manual or service guide for your specific model will be invaluable. This resource typically includes wiring diagrams, part specifications, and troubleshooting steps tailored to your Harley Davidson.
Ultimately, the combination of these tools creates a holistic approach to maintaining your bike’s electrical system, empowering you to address issues promptly, ensuring both performance and safety on the road. Be sure to keep your toolkit organized and readily accessible whenever you plan to dive into electrical repairs.
Step-by-Step Guide to Testing Voltage Regulator Accuracy
To ensure your Harley Davidson is running optimally, it’s essential to periodically test the accuracy of the voltage regulator. A malfunctioning regulator can lead to charging issues that may damage your battery or electrical components. By following this step-by-step guide, you can effectively gauge the performance of your voltage regulator and maintain the integrity of your bike’s electrical system.
Begin by ensuring your motorcycle is securely parked and the engine is turned off. Connect your digital multimeter to the battery terminals; the red probe should connect to the positive terminal, while the black probe connects to the negative terminal. With the multimeter set to measure DC voltage, start your engine and let it idle. At this point, you should observe and record the voltage reading from the multimeter. A properly functioning voltage regulator will typically produce a voltage between 13.5 to 14.5 volts. If your reading falls below this range, it signifies that the regulator may be undercharging the battery.
Next, increase the engine RPMs to around 3,000 and monitor the multimeter for any significant fluctuation in voltage. The reading should ideally remain consistent. If the voltage spikes significantly or drops below the previous reading, this erratic behavior may indicate an issue with the regulator’s ability to maintain voltage under load. Additionally, check for any loose or corroded connections at the battery or regulator terminals, as these can also impact the accuracy of your readings.
In cases where the voltage does not stabilize or remains out of range at both idle and increased RPMs, it’s time to consider further diagnostics or a replacement. Leverage your service manual to ensure you are familiar with the specific electrical specifications for your Harley model. By routinely testing the voltage regulator and staying proactive about your electrical system, you can prevent unexpected failures and costly repairs down the line.
Common Signs of Voltage Regulator Issues on Harley Davidson Bikes
A failing voltage regulator can be a sneaky problem that manifests in various ways, affecting the performance and reliability of your Harley Davidson. Recognizing the signs early is crucial to prevent potential damage to your motorcycle’s electrical system. One of the most immediate indicators of a voltage regulator issue is erratic charging behavior. If you notice that your headlights flicker or dim when turning on electrical accessories like heated grips or the radio, it’s a strong signal that the regulator may not be functioning correctly. This can lead to insufficient power supply to essential components, making rides less enjoyable and potentially unsafe.
Another common symptom is an abnormal voltage reading from your battery during tests. A healthy voltage regulator typically maintains a voltage range between 13.5 to 14.5 volts while the engine is running. If your tests show readings consistently outside this range, it can indicate that the regulator is either overcharging or undercharging the battery. Overcharging might lead to battery damage, while undercharging can leave you stranded due to a drained battery. Additionally, watch for warning lights on your dashboard: if your charging system light activates, it’s time for an inspection.
- Backfiring or Rough Idling: If the voltage regulator is faulty, it can lead to voltage spikes that may cause the ignition system to misfire, resulting in backfiring or rough engine performance.
- Corroded Connections: Inspect for corrosion at the battery and regulator connections; this not only affects voltage readings but can also lead to further electrical issues.
- Battery Issues: Frequent dead batteries or having to constantly jump-start your bike could be a direct consequence of a failing voltage regulator unable to keep the battery charged correctly.
By being vigilant and taking notice of these symptoms, you can address issues with the voltage regulator before they escalate, protecting both your motorcycle’s performance and your investment. Regular maintenance and testing should be part of your routine to ensure that your Harley Davidson remains in prime condition for every ride.
Understanding Voltage Regulation in Harley Davidson Motorcycles
Understanding the intricacies of voltage regulation is essential for any Harley Davidson owner seeking to maintain peak performance and reliability in their motorcycle’s electrical system. At its core, the function of a voltage regulator is to ensure that the voltage supplied to the motorcycle’s electrical components remains stable and within an optimal range, typically between 13.5 and 14.5 volts while the engine is running. This regulation is critical in safeguarding the battery and electrical components from voltage fluctuations that could lead to damage or inefficient operation.
Harley Davidson motorcycles utilize various types of voltage regulators, which can vary significantly in design and functionality between models. Most modern Harley motorcycles are equipped with advanced regulators that can adjust the output voltage dynamically to match the load conditions during operation. This sophistication enhances reliability, ensuring that sensitive components like the fuel injection system and electronics receive a consistent power supply, which is crucial for overall motorcycle performance.
A common issue with voltage regulation arises from the combination of heat and vibration typical in a motorcycle environment, which can lead to component failure over time. Regular inspection of the voltage regulator should include checking for signs of wear, corrosion on terminals, and ensuring that the unit is securely mounted to avoid excessive vibration. Understanding this part of your electrical system empowers you to take proactive steps in maintenance, such as cleaning connections and verifying the integrity of the regulator alignments.
To illustrate, consider the scenario in which a rider experiences dimming headlights or erratic performance from the audio system when additional accessories are activated. This not only reflects a potential failing voltage regulator but also underscores the importance of monitoring voltage levels and equipment condition regularly. Developing a habit of routine inspections and testing can save riders from more serious issues down the road, such as unexpected breakdowns or costly repairs.
Advanced Troubleshooting Techniques for Voltage Regulator Problems
Understanding the nuances of troubleshooting a voltage regulator can significantly enhance your motorcycle maintenance skills, especially for Harley Davidson owners. A failing voltage regulator can lead to inadequate power supply to crucial electrical components, creating an array of performance issues. Employing advanced troubleshooting techniques not only helps in identifying the problem but also avoids unnecessary replacements and repairs, saving both time and money.
Begin your troubleshooting by conducting a visual inspection. Look for signs of damage or corrosion on the voltage regulator itself, connectors, and wiring. Pay particular attention to the integrity of the ground connection as a poor ground can affect voltage regulation efficiency. If you notice signs of overheating, such as discolored components or an unusual smell, these are strong indicators that a deeper issue might exist.
Next, utilize a multimeter to perform a voltage output test. Connect the multimeter to the battery terminals with the engine running. A properly functioning regulator should produce a voltage reading between 13.5 to 14.5 volts. If the voltage stays below this range, your regulator might not be charging the battery effectively, while a reading consistently above this range could indicate a malfunction that risks damaging your motorcycle’s electrical system.
For more in-depth diagnostics, consider performing a load test. This process involves turning on several electrical accessories (headlights, audio system, etc.) while monitoring the voltage output. A decline in voltage under load suggests that the regulator is struggling to maintain output, indicative of potential failure. Additionally, check the regulator’s heat sink; if it is too hot to touch, this may signify that the regulator is working excessively hard, potentially leading to premature failure.
In conclusion, applying systematic troubleshooting steps not only clarifies the current state of your voltage regulator but also equips you with the knowledge to make informed decisions about repairs or replacements. By being methodical and precise, you not only enhance your motorcycle’s reliability but also elevate your proficiency in electrical systems – an invaluable asset for any Harley Davidson enthusiast.
When to Replace Your Voltage Regulator: Signs and Solutions
When it comes to maintaining the electrical health of your Harley Davidson, the decision to replace a failing voltage regulator can significantly influence the performance of your bike. A voltage regulator is crucial in managing electrical output, but how can you be sure it’s time for a replacement? Understanding the symptoms of a malfunctioning regulator is key.
Common signs indicating that your voltage regulator may need replacement include persistent dimming or flickering lights, excessive heat generation, or a significant drop in voltage output during rides. For example, if you notice that your headlights dim noticeably when you rev the engine or the bike struggles to start, these may be direct signals of electrical inconsistencies tied to the regulator’s performance. Furthermore, if your battery frequently drains or requires jump-starts, it could mean the regulator isn’t effectively charging the battery.
To address these issues, replace the regulator with a dependable model-consider your options between OEM and aftermarket parts. OEM parts often ensure compatibility and reliability, whereas aftermarket regulators can sometimes provide better performance at a lower cost. Be sure to compare features and warranties before making your choice.
While symptoms may point to a failing voltage regulator, it’s also essential to verify with precise voltage tests and visual inspections. Regular maintenance checks and being attuned to your motorcycle’s performance will empower you to address electrical issues before they escalate, ultimately prolonging the life of your bike and providing you with a safer riding experience.
Comparing Aftermarket vs OEM Voltage Regulators for Harley Davidson
When considering a replacement for your Harley Davidson’s voltage regulator, it’s essential to weigh the pros and cons of aftermarket versus OEM (Original Equipment Manufacturer) options. The most significant advantage of OEM regulators is that they are designed specifically for your motorcycle model, guaranteeing compatibility and reliability based on the manufacturer’s standards. This is particularly important because an improperly matched regulator can lead to further electrical issues, negatively impacting performance or longevity.
However, aftermarket regulators can be an attractive alternative. Many aftermarket products are engineered to outperform OEM parts, often incorporating advanced features such as superior heat dissipation or enhanced durability. Additionally, they can come at a lower price, providing significant savings for the budget-conscious rider. It’s crucial to research reputable aftermarket brands and read reviews from other Harley owners to ensure you’re purchasing a reliable part.
When making the decision, consider the following factors:
- Performance: Aftermarket regulators may offer specifications that outperform OEMs, such as higher voltage tolerances.
- Warranty: OEM parts usually come with a manufacturer’s warranty that covers defects, while aftermarket warranties may vary significantly.
- Installation: OEM regulators are often easier to install due to their precise fit, whereas some aftermarket options might require modifications.
- Availability: Depending on your bike’s model, OEM parts may have longer wait times or stock issues compared to the broad availability of aftermarket solutions.
Ultimately, whether you prioritize cost, performance, or assurance of fit will influence your choice. Carefully considering these aspects can empower you to select the right voltage regulator, ensuring optimal electrical performance for your Harley Davidson and paving the way for a smoother, more reliable ride.
Tips for Maintaining Your Harley Davidson’s Electrical System
Maintaining the electrical system of your Harley Davidson is crucial to ensure optimal performance and longevity. A well-functioning electrical system prevents issues from arising, such as battery drain or voltage regulator failures. One effective approach to maintaining your bike’s electrical system is to perform regular inspections. Check connections for corrosion or loose wiring, as these issues can impede performance. In addition, ensure that your battery terminals are clean and tight, as poor connections can lead to voltage drops.
Another key tip is to keep your motorcycle’s electrical components clean and dry. Moisture can lead to corrosion, which deteriorates connections and can cause electrical failures. Use a gentle cleaner suited for automotive electrical systems and ensure that all components are thoroughly dried after cleaning. Additionally, consider using dielectric grease on connectors to help protect against moisture and corrosion.
It’s also essential to monitor your bike’s voltage output regularly. Utilize a multimeter to measure the voltage at the battery and ensure it falls within the recommended range. A healthy Harley Davidson should show voltage levels around 12.6 volts when the engine is off and between 13.5 to 14.5 volts when running. If readings are outside these parameters, this could indicate a failing voltage regulator or other issues in the charging system.
Lastly, invest in quality aftermarket or OEM replacement parts when necessary. Quality components not only enhance performance but also contribute to the electrical system’s longevity. Regularly update yourself on manufacturer recommendations for maintenance schedules and consider consulting schematics or service manuals specific to your model for detailed guidance on maintaining your electrical system. Taking these proactive steps can keep your Harley Davidson’s electrical system running smoothly and efficiently for many miles to come.
Best Practices for Voltage Regulator Installation and Setup
Proper installation and setup of the voltage regulator is vital for the electrical system of your Harley Davidson, ensuring reliability and optimal performance. A faulty voltage regulator can lead to a range of issues, including battery overcharging or undercharging, which can have costly consequences. To ensure installation success, following best practices can make a significant difference in the longevity and effectiveness of your regulator.
First and foremost, start by ensuring a clean and dry installation area. Any moisture or debris can interfere with the electrical connections, leading to poor performance or malfunction. Before proceeding, disconnect the battery to prevent any unexpected short circuits. When removing the old regulator, carefully note the wiring configurations to ensure accurate reinstallation. Use a multimeter to check for voltage irregularities before removing the old part; this can help confirm that the regulator was indeed the source of the problem.
Essential Steps for Voltage Regulator Installation
- Inspect the New Regulator: Before installing, visually check the new voltage regulator for defects and ensure it is the correct model for your Harley.
- Check Wiring Harness: Look for any signs of wear or corrosion in the wiring harness. Clean or replace any damaged connectors to guarantee a secure fit.
- Use Proper Torque Specifications: When securing the regulator, apply the manufacturer’s specified torque settings to avoid damage or loosening over time.
- Protect Connectors: Apply dielectric grease to the connectors to prevent moisture and corrosion. This simple step can enhance the longevity of the connections and improve performance.
- Secure Mounting: Ensure that the voltage regulator is mounted firmly in its designated location. Vibration can quickly loosen components if not secured properly.
After installation, reconnect the battery and conduct a full system check. Use a multimeter to measure the voltage output at the battery both with the engine off and running. A healthy voltage regulator will typically show a voltage around 12.6 volts at rest and between 13.5 to 14.5 volts when the engine is active. Monitoring these parameters immediately after installation can help verify that the new regulator is functioning correctly.
Implementing these best practices not only simplifies the installation process but also significantly reduces the risk of future electrical issues. A well-installed voltage regulator contributes to a more reliable riding experience, allowing you to focus on the exhilaration of the road ahead.
Safety Precautions When Testing Electrical Components on Motorcycles
When it comes to testing the electrical components of your Harley Davidson, particularly the voltage regulator, safety should be your foremost priority. Electrical systems can carry significant voltage and current, which can be hazardous if proper precautions are not taken. Before you begin any testing, ensure you have the right tools on hand and perform a thorough safety check of your workspace. Wearing appropriate safety gear, such as insulated gloves and safety glasses, will provide you with a crucial layer of protection against potential electric shock and debris.
To minimize risks during testing, follow these essential precautions:
- Disconnect the Battery: Always disconnect the negative terminal of the battery before starting any electrical work. This step will prevent accidental short circuits and protect both you and the motorcycle’s electrical components.
- Avoid Water and Moisture: Ensure that your work area is dry and free from moisture. Water is a conductor and can increase the risk of shock. If your motorcycle has been exposed to rain, dry off any wet components thoroughly before conducting tests.
- Inspect Tools and Equipment: Check all tools and testing equipment for damage or wear. Use insulated tools designed for electrical work, and regularly inspect them to ensure they are in good condition.
- Work in a Well-Lit Area: Good visibility is essential when working with small electrical components. A well-lit workspace will help you avoid mistakes and see any potential hazards more clearly.
- Be Mindful of Capacitors: Always assume that capacitors are still charged, even after disconnecting the battery. You can safely discharge a capacitor using a resistor, following proper procedures. This step can help prevent electric shock.
If you encounter any unusual resistance while testing with a multimeter or observe flames, smoke, or unusual smells emanating from any component, stop work immediately and assess the situation. Understanding the basics of electrical safety not only enhances your proficiency as a motorcycle owner but also contributes to building a safer environment for all involved in the maintenance and repair of Harley Davidson motorcycles. By adhering strictly to safety practices, you ensure not just your own safety but also the longevity and reliability of your bike’s electrical system, ultimately enjoying a more secure and dependable ride.
Faq
Q: How do I know if my Harley Davidson voltage regulator is bad?
A: Common signs of a failing voltage regulator include inconsistent headlight brightness, battery charging issues, and warning lights on the dashboard. If your motorcycle experiences these symptoms, further testing may be necessary to confirm the issue. Refer to the “Common Signs of Voltage Regulator Issues” section in your guide.
Q: What tools do I need to test my Harley Davidson voltage regulator?
A: Essential tools for testing your voltage regulator include a multimeter to measure voltage, a wiring diagram for your model, and standard hand tools for access. For a comprehensive list, see the “Essential Tools for Testing Your Harley Davidson Voltage Regulator” section.
Q: Can I test the voltage regulator without removing it from the motorcycle?
A: Yes, you can test the voltage regulator while it’s still installed. Use a multimeter to check the voltage output at various RPMs. If the readings exceed 14.5 volts or drop below 13 volts, the regulator may need replacement. Refer to the “Step-by-Step Guide to Testing Voltage Regulator Accuracy” for detailed instructions.
Q: What voltage readings should I expect from a functioning voltage regulator?
A: A properly functioning voltage regulator should maintain voltages between 13.5 to 14.5 volts while the bike is running. If the voltage is consistently outside this range, it indicates the regulator is not functioning correctly. Check the “Step-by-Step Guide to Testing Voltage Regulator Accuracy” for more insights.
Q: How often should I check my Harley Davidson voltage regulator?
A: It’s advisable to check your voltage regulator and the overall electrical system during regular maintenance intervals or if you’ve noticed any signs of electrical issues. Regular checks help prevent unexpected failures or costly repairs.
Q: When should I replace my Harley Davidson voltage regulator?
A: Replace your voltage regulator if it consistently produces incorrect voltage readings or if you observe symptoms like flickering lights or battery drain. See “When to Replace Your Voltage Regulator: Signs and Solutions” for more detailed guidance.
Q: What can cause my voltage regulator to fail prematurely?
A: Premature voltage regulator failure can be caused by overheating, electrical shorts, or poor connections within the electrical system. Maintain clean connections and ensure proper installation according to the “Best Practices for Voltage Regulator Installation and Setup.”
Q: Is there a difference between aftermarket and OEM voltage regulators?
A: Yes, aftermarket regulators may offer cost savings but can vary in quality and performance compared to OEM parts. It’s essential to research and consider your motorcycle’s needs when choosing between them. The section “Comparing Aftermarket vs OEM Voltage Regulators for Harley Davidson” provides further insights.
Feel free to explore the related sections of your guide for additional information on maintaining your Harley Davidson motorcycle’s electrical system!
In Retrospect
Now that you’ve learned how to effectively test your Harley Davidson voltage regulator, it’s time to take action. Ensuring your bike’s electrical system is functioning optimally not only improves performance but keeps you safe on the road. If you have any lingering questions or need further assistance, don’t hesitate to check out our detailed guides on motorcycle electrical systems and common electrical issues.
Join our community by signing up for our newsletter for exclusive tips and updates on bike maintenance. Remember, a well-maintained voltage regulator can significantly enhance your ride’s longevity and performance-don’t put it off! Share your testing experiences in the comments below or explore more of our content on motorcycle repairs to keep your bike running smoothly. Your journey to mastery starts with every repair you tackle.