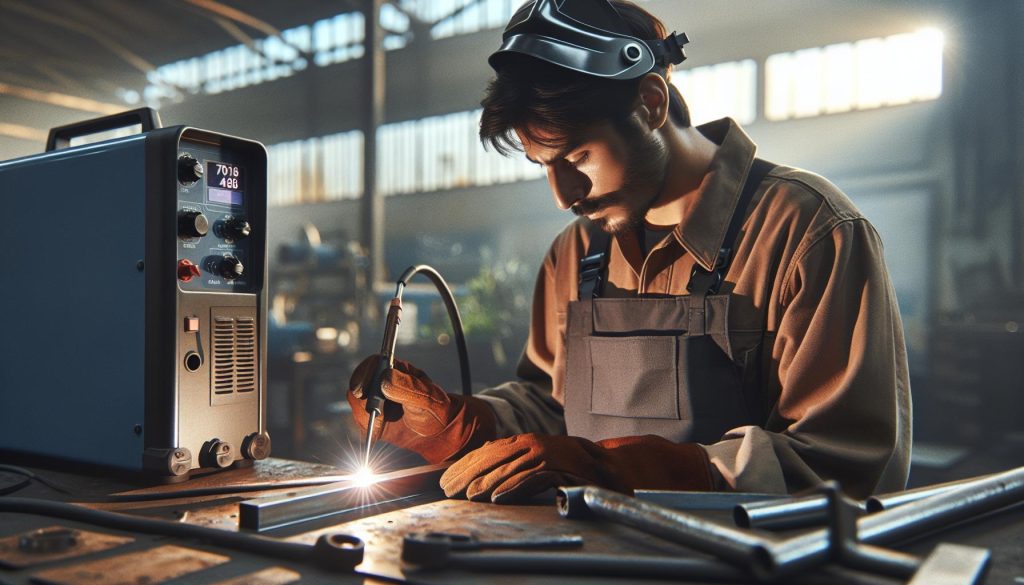
Choosing the correct amperage for a 7018 welding rod is crucial for achieving strong, clean welds. Not only does proper amperage ensure the structural integrity of your projects, but it also directly impacts the efficiency and ease of your welding process. Many welders often struggle with settings, leading to issues such as welds that are too cold, resulting in poor penetration, or too hot, causing excessive spatter and weak joints. Understanding the optimal power settings for 7018 rods can significantly enhance your welding performance and outcomes. As you dive deeper into this topic, you’ll discover valuable tips that can elevate your skills, reduce frustrations, and ensure your welds meet professional standards. Curious about how to harness the full potential of your 7018 rods? Let’s explore the key factors that determine the right amperage and unlock your welding success.
What is Amperage in Welding?

Amperage, often referred to as the measure of electric current in welding, plays a crucial role in determining the quality and characteristics of a weld. It primarily influences the heat generated by the welding process, as the amount of current flowing through the electrode directly correlates to the amount of heat produced. This heat is essential for melting the base and filler materials, allowing for proper fusion. Understanding the relationship between amperage and welding outcomes can significantly improve a welder’s proficiency, particularly when using specific welding rods like the 7018.
For the 7018 welding rod, which is known for its low hydrogen content and strong mechanical properties, the optimal amperage range is generally between 70 to 130 amps, depending on the thickness of the material being welded. If the amperage is set too low, the weld may lack proper penetration and strength, resulting in weak joints. Conversely, too high an amperage can lead to burn-through or excessive spatter, deteriorating the overall quality of the weld. Thus, selecting the right amperage is vital to achieving a strong and aesthetically pleasing weld.
In practice, achieving the right amperage can be influenced by several factors, such as the type and thickness of the materials being joined, the position of the weld, and the specific welding process being used. For instance, horizontal or overhead positions might require different settings compared to flat positions due to gravity’s impact on the molten weld pool. Additionally, environmental conditions, such as wind or moisture, can affect heat dispersion and thus require adjustments in amperage settings.
To effectively adjust the welding machine’s amperage settings, it’s recommended to begin with the manufacturer’s guidelines for the specific type of rod you’re using. Fine-tuning the settings based on test welds and visual inspection of the weld quality will help determine the most effective amperage for achieving optimal results. By carefully monitoring the welding process and making necessary adjustments, welders can enhance their skills, avoid common mistakes, and ensure high-quality welds consistently.
Understanding 7018 Welding Rod Characteristics

The 7018 welding rod is a cornerstone in the industry, known for its versatility and mechanical strength, making it a favorite among welders for various structural applications. This low hydrogen electrode is particularly well-suited for welding high-strength steels and is often used in situations that require durability and resistance to cracking. What sets the 7018 rod apart is its ability to produce high-quality welds with a smooth and stable arc, which plays a critical role in ensuring strong fusion between the base and filler materials.
One of the defining characteristics of the 7018 rod is its coating, which not only aids in arc stabilization but also helps to minimize hydrogen content in the weld. This is critical as excess hydrogen can result in hydrogen-induced cracking, especially in thicker materials. The 7018 welding rod is typically used in a variety of positions, and it excels in horizontal and flat welding due to its low spatter and excellent bead appearance. Additionally, when working with this rod, maintaining the correct amperage settings is vital; deviations can lead to poor penetration, incomplete fusion, or even burn-through, compromising the integrity of the weld.
- Versatility: Suitable for various applications including pressure vessels, bridges, and structural components.
- Low Hydrogen Content: Reduces the risk of cracking and enhances weld quality.
- Adaptability: Effective in different welding positions, primarily flat and horizontal.
Proper handling and storage of the 7018 rods are also important to maintain their characteristics. Moisture can negatively impact their performance, so they should be kept in a dry environment, and it’s advisable to preheat them before use if they have absorbed any moisture. Understanding these nuanced characteristics allows welders to make informed choices about their amperage settings, further enhancing their welding outcomes and contributing to stronger, more reliable welds.
Optimal Amperage Range for 7018 Rods

The proper amperage settings are essential for utilizing 7018 welding rods effectively, as they can significantly impact the quality of a weld. For most applications, maintaining an amperage between 70 and 120 amps per electrode is recommended, with the specific value often varying based on the thickness of the material being welded. As a general guideline, a good starting point is about 90 amps for 1/8 inch (3.2 mm) rods, but adjustments should be made for different thicknesses.
Using insufficient amperage can result in weak penetration, leading to poor fusion at the weld joint. Conversely, excessive amperage may cause burn-through, especially on thinner materials, and can create a less aesthetically pleasing bead. A well-adjusted amperage setting enables the welder to achieve a stable arc while also optimizing travel speed, which is crucial for producing strong, consistent welds.
Welders can utilize the following parameters to determine the optimal amperage:
- Rod Diameter: Thicker rods require higher amperage. For example, a 3/16 inch (4.8 mm) 7018 rod typically calls for about 120 amps.
- Material Thickness: Thicker base metals necessitate more heat for effective fusion.
- Puddle Control: The right amperage facilitates better control over the molten weld pool, enhancing the weld’s appearance.
By observing these factors, welders can ensure that their 7018 welding process yields optimal results, reducing the likelihood of defects and enhancing the overall integrity of their work. The choice of amperage is not just a technical specification; it’s a skill that develops with experience and understanding of the welding process and materials in use.
Factors Affecting Amperage Settings
The effectiveness of welding with 7018 rods heavily relies on the proper amperage settings, which are influenced by several critical factors. Understanding these factors is essential for achieving high-quality welds, ensuring good fusion, and preventing issues such as burn-through or weak penetration.
Among the primary elements affecting amperage is the thickness of the material being welded. As a general rule, thicker materials require higher amperage to achieve adequate heat and penetration. For instance, when working with heavy steel plates, one might have to adjust the amperage significantly up compared to welding thin sheet metal. This adjustment ensures that the weld pool remains molten long enough to fuse appropriately at the joint, thereby enhancing the structural integrity of the weld.
Another aspect to consider is the diameter of the welding rod. Larger diameter rods demand more heat. For example, a 1/8 inch (3.2 mm) 7018 rod might work well at around 90 amps, while a thicker 3/16 inch (4.8 mm) rod could necessitate settings closer to 120 amps. Understanding the relationship between rod size and amperage is crucial for welders to avoid under-heating or over-heating the material.
Additionally, welding position can impact the amperage needed. Different positions-such as flat, horizontal, vertical, or overhead-alter the dynamics of the weld pool and may require fine-tuning of the amperage. For example, welding overhead often demands a slightly higher amperage to counteract gravity’s effects on the molten puddle, enabling better control and execution of the weld.
Lastly, travel speed-the rate at which the welder moves along the welding joint-can also dictate the right amperage setting. A slower travel speed generally requires higher amperage to maintain the appropriate heat in the weld pool, ensuring that the molten metal adequately penetrates the base materials. Conversely, moving too quickly can lead to poor fusion and insufficient penetration if the amperage isn’t adjusted accordingly.
Incorporating these considerations into practice helps welders harness the full potential of 7018 rods, leading to higher quality, more durable welds. Mastering these factors is a vital part of the skillset that separates novice welders from seasoned professionals, capable of producing flawless welds under various conditions.
How to Adjust Welding Machine Settings
Adjusting the settings on your welding machine is crucial for achieving optimal performance, especially when using a 7018 welding rod. Many novice welders underestimate the importance of fine-tuning their equipment, which can lead to poor weld quality and increased defects. Understanding the specific requirements of the 7018 rod-known for its versatility and high-quality welds-can help you make the necessary adjustments for each project.
To begin, consult your machine’s manual for guidance on the amperage range suitable for the specific diameter of the 7018 rod you are using. For instance, a 1/8 inch rod typically operates well around 90 amps, whereas a 3/16 inch rod may require around 120 amps. Once you’ve identified the correct range, make sure to set your machine’s output accordingly. Depending on the material thickness, you may need to slightly increase or decrease the amperage to accommodate varying conditions. A thicker material will usually need more heat to ensure proper penetration and fusion.
Another factor to consider is the welding position. If you’re working in an overhead position, you might need to bump up the amperage a bit more than in a flat position due to gravity impacting the flow of the molten weld pool. Be prepared to adjust your machine settings based on the position and angle of your work. Additionally, travel speed plays a vital role; welding too fast can lead to insufficient fusion, while too slow a speed may overheat the joint. It’s essential to find a balance, often achieved through trial and error, pairing your speed with the right amperage.
Prior to starting any welding task, always perform a test weld on scrap material to verify your settings. This will not only allow you to assess the quality of the weld but also lets you make any last-minute adjustments to the amperage or travel speed based on the initial results. Keeping a welding journal to record successful settings for different materials and positions can greatly benefit your proficiency over time, turning you into a more skilled and effective welder.
Common Mistakes in Amperage Selection
Selecting the correct amperage during welding is crucial, especially when working with the versatile 7018 welding rod. A common pitfall for both novice and experienced welders is the tendency to either underutilize or overestimate the required amperage, leading to subpar weld quality. Misjudging amperage can result in issues like poor penetration, excessive spatter, and even weld fractures, ultimately undermining the integrity of the joint.
One frequent mistake is relying solely on manufacturer specifications without considering specific project conditions. While guides often suggest a typical amperage range for different rod sizes, many welders fail to adjust their settings based on variables such as material thickness or specific welding positions. For instance, welding in an overhead position may necessitate higher amperage to ensure that the molten pool adopts adequate characteristics to prevent sagging or lack of fusion. Therefore, always fine-tune your settings based on the actual conditions you’ll encounter.
Additionally, many welders hesitate to adjust their travel speed in relation to amperage settings. There’s a delicate balance to maintain: welding too fast might lead to inadequate fusion, while moving too slowly can exacerbate overheating, causing excessive slag and burn-through. A proactive approach is to conduct test welds on scrap pieces, allowing you to refine both amperage and travel speed in tandem, thus developing a more intuitive understanding of how they interact.
Lastly, inexperienced welders often overlook the importance of maintaining clean work surfaces. Contaminants like oil, rust, or paint can interfere with proper weld formation, leading to the mistaken conclusion that the amperage is insufficient. Maintaining clean materials can greatly enhance the chances of achieving a solid weld. By being aware of these common mistakes and actively working to rectify them, welders can significantly improve their proficiency and the quality of their welds.
Comparing Amperage Needs for Different Welding Positions
When it comes to welding with the 7018 rod, understanding how different welding positions affect amperage needs is critical for achieving strong, quality welds. Each position-flat, horizontal, vertical, and overhead-poses unique challenges that influence the appropriate amperage settings. For example, welding in the flat position generally requires the lowest amperage compared to other positions because gravity assists in keeping the molten pool in place, leading to better penetration without overwhelming the material. Typical settings for flat welding might hover at the lower end of the recommended amperage range for the 7018 rods.
Conversely, overhead welding necessitates higher amperage due to gravity working against the welder. In this position, the molten pool can drip or sag if the amperage is too low. A higher amperage setting helps maintain a stable arc and ensures the weld pool stays molten enough to mitigate issues like incomplete fusion and excessive slag formation. It’s not uncommon for experienced welders to adjust their amperage upwards by 10-20% when transitioning from flat to overhead positions to accommodate these challenges.
Another consideration is the vertical position, where the angle of the welding rod and the motion of the weld can significantly alter the amperage needs. Vertical welding often requires careful manipulation of both speed and amperage, as the welder must create a solid bead without allowing the molten metal to flow uncontrollably. Here, maintaining a slightly increased amperage helps counteract the cooling effect of the vertical angle and assists in achieving proper penetration.
Lastly, different materials and thicknesses require further adjustments in amperage. For instance, welding galvanized or stainless steel might necessitate different amperage settings even within the same position due to the base material’s thermal conductivity and thickness. Therefore, a combination of technique, experience, and understanding of the specific project conditions is essential for successfully determining optimal amperage settings for various welding positions. Emphasizing these nuances not only enhances weld quality but also promotes a safer working environment as the welder becomes more attuned to the equipment’s performance across different scenarios.
Best Practices for 7018 Welding Techniques
Achieving high-quality welds with the 7018 rod requires mastery of a few essential techniques and practices. One of the most effective methods for enhancing the performance and durability of your welds is to maintain a consistent travel speed while welding. A steady pace not only ensures even heating across the weld area but also allows the welder to control the molten pool more effectively. Rapid movements can lead to inadequate fusion and excessive slag, while a slow pace might result in burn-through or lumpy welds.
Another key practice is proper joint preparation. Before you begin welding, it’s crucial to clean the surfaces to remove contaminants such as rust, paint, and oil, which can significantly affect the weld quality. Additionally, ensure that the joint fit-up is correct. Gaps or misalignments can lead to weak spots that compromise the integrity of the finished weld. Using techniques like backstepping or weaving can also help manage heat distribution and promote better penetration, especially in thicker materials.
Additionally, adjusting the electrode angle can greatly impact the quality of the weld bead. Generally, holding the 7018 electrode at a 10 to 15-degree angle from vertical ensures proper deposition and arc stability. For root passes in a groove joint, keep the electrode closer to vertical, while wider beads may benefit from tilting the electrode slightly. Understanding these nuances allows for greater adaptability to various positions and materials.
Finally, maintaining a positive mindset and investing in regular practice is vital. Welding is as much an art as it is a science; proficient welders often develop a ‘feel’ for their equipment and the materials they work with over time. Consider setting up practice welds on scrap pieces of the same material you plan to work with, experimenting with various amperage settings and travel speeds. This not only builds confidence but also empowers you to tackle real-world projects with enhanced skill and safety awareness. By integrating these best practices into your routine, you’re well on your way to mastering 7018 welding techniques and producing quality welds consistently.
Tips for Maintaining Consistent Amperage
Maintaining a consistent amperage when using 7018 welding rods is crucial for achieving high-quality welds. Variations in amperage can lead to poor fusion, excessive spatter, and inconsistent bead appearance. One effective strategy to ensure stable amperage is to regularly calibrate your welding machine, verifying that settings align with the recommended ranges for 7018 rods, typically between 70 to 140 amps depending on the material thickness and position.
To further support consistent amperage during your welding process, consider these practical tips:
- Proper Cord and Connection Maintenance: Ensure that all cables and ground connections are in good condition, as worn or damaged leads can introduce resistance, causing fluctuations in amperage.
- Electrode Status: Use freshly delivered rods, as older or damp electrodes can affect arc stability. Always store rods in a suitable environment to maintain their integrity.
- Technique Consistency: Adhere to a uniform travel speed and angle while welding, as deviations can change the required amperage and impact weld quality.
- Monitoring Equipment: Utilize an ammeter in your setup to continually monitor amperage while welding; this will allow for real-time adjustments if necessary.
Regularly reviewing your welding practices and staying informed about the effects of different materials and positions on amperage requirements will also contribute significantly to maintaining consistent settings. By keeping all these factors in check, you can ensure better control over your welding process and ultimately produce stronger, more reliable welds.
Advanced Techniques for 7018 Welding Mastery
Achieving mastery in welding with 7018 rods goes beyond just understanding the optimal amperage settings; it requires adopting advanced techniques that enhance your skill and ensure superior weld quality. One fundamental aspect is the manipulation of travel speed and electrode angle. A slower travel speed allows for better penetration and filling, while the right angle-typically around 15-20 degrees from vertical-helps stabilize the arc and distribute heat more effectively.
Electrode Manipulation
Utilizing a weaving motion during the weld can significantly improve your results. This technique helps control the heat input and arc length, allowing for a more consistent and balanced bead. For example, a slight zigzag pattern can fill larger gaps and improve fusion in wider joints. However, it’s essential to remain mindful of the amperage; if the rod moves too slowly, overheating might occur, leading to burn-through.
Heat Management
Managing heat effectively is crucial, especially with 7018 rods, known for their low hydrogen content. Maintaining a uniform heat distribution mitigates the risk of cracking and deformation. Preheating thicker materials is also recommended, as it helps to reduce temperature differentials within the weld area. With the right combination of amperage and travel speed, along with effective heat management, you can produce strong, durable welds.
Post-Weld Techniques
Finally, don’t overlook post-weld treatment. Peening the bead while it’s still hot can relieve stresses introduced during the welding process. Additionally, grinding or brushing the weld after cooling removes slag and impurities, ensuring a clean finish and promoting better inspection results.
By focusing on these advanced techniques, you can refine your approach to 7018 welding, achieving a balance between speed, quality, and structural integrity. As you cultivate these skills, you will not only enhance your proficiency but also increase your value in the welding industry, positioning yourself for further advancement in your career.
Real-World Applications of 7018 Welding
Understanding the diverse applications of 7018 welding rods is critical for welders looking to enhance their skillset and expand their opportunities in various industries. These low-hydrogen electrodes are not just for structural applications; their versatility makes them suitable for multiple welding tasks across several sectors.
In the construction industry, the 7018 rod is widely used due to its ability to create strong, durable welds in high-stress environments. It is particularly effective for welding carbon and low-alloy steels, commonly found in steel frames and structural components. For example, when erecting steel buildings or bridges, the welds made using 7018 are crucial for maintaining structural integrity, especially under heavy loads or vibrations.
Manufacturing also benefits significantly from 7018 welding. Components for machinery, automotive parts, and pressure vessels often require high-strength welds that can withstand immense stress and fatigue. The ability of 7018 rods to produce clean welds with minimal spatter makes them ideal for these applications, allowing for a more efficient post-weld cleanup process. Moreover, because of their toughness, these rods are particularly useful in fabricating components that will face corrosive or extreme temperature conditions, such as in oil rigs or power plants.
Additionally, the need for precision in welding applications related to pipework cannot be overstated. Industries such as oil and gas or water treatment frequently employ 7018 welding for pipe fabrication. The rods’ characteristics ensure deep penetration and good fusion with the base material, essential for producing leak-proof joints.
Committed welders can maximize the benefits of using 7018 rods by adjusting their amperage settings according to the thickness of the material and the welding position. For instance, standard amperage ranges between 70 to 130 amps may vary based on the project specifications. Ensuring the right settings translates to improved penetration and weld quality, crucial for applications where safety and reliability are paramount.
In summary, the rods extend well beyond just routine jobs; they play an essential role in constructing reliable infrastructure, manufacturing high-quality products, and ensuring that critical pipelines function effectively. By mastering these techniques and understanding their applications, welders can significantly enhance their proficiency and adaptability in a competitive job market.
Troubleshooting Weld Quality Issues Related to Amperage
Weld quality issues can often be traced back to improper amperage settings. Amperage plays a crucial role in how well the electrode fuses to the base metal, and selecting the right settings can mean the difference between a well-executed weld and a major failure that compromises integrity. Variations in amperage significantly affect penetration, bead appearance, and the overall strength of the weld. Recognizing the symptoms of amperage-related problems can help you troubleshoot effectively.
A common issue related to incorrect amperage is poor penetration. If the amperage is too low, the weld may sit on top of the material rather than penetrating adequately. This results in a weak bond that can lead to cracks or complete failure under stress. Conversely, excessive amperage can create excessive burn-through, especially on thinner materials, leading to a loss of material integrity and potentially creating holes that require rework. To avoid these pitfalls, regular checks against material thickness and welding position can guide you toward optimal settings-generally, 70 to 130 amps for a 7018 electrode, depending on these factors.
Another symptom to watch for is excessive spatter or a rough bead appearance. Too much heat can cause the filler material to melt excessively, leading to a wide, inconsistent bead with significant spatter, complicating cleanup and affecting overall appearance. It’s beneficial to adjust your amperage down slightly if spatter becomes a frequent issue. Additionally, adjusting your travel speed can complement amperage adjustments. Slower travel generally requires lower amperage to maintain proper control.
When troubleshooting weld quality issues, consider using a visual inspection method, examining the bead for uniformity, penetration, and surface finish. A careful review of your settings, along with consistent practice, allows welders to become adept at adjusting parameters to achieve the best results. Keeping a log of settings used for specific materials and conditions can also guide future projects and refine your approach over time.
Frequently asked questions
Q: What is the ideal amperage for 7018 welding rods?
A: The ideal amperage range for 7018 welding rods is typically between 70 to 140 amps, depending on the thickness of the base metal. Adjust settings to the rod diameter and position to ensure optimal penetration and weld quality.
Q: How does the thickness of the material affect amperage settings for 7018 rods?
A: Thicker materials generally require higher amperage to ensure proper penetration and a strong weld. For materials over 1/4 inch, use the upper end of the 7018 amperage range (120-140 amps).
Q: What are common mistakes when setting amperage for 7018 welding rods?
A: Common mistakes include using too low amperage, which can lead to insufficient penetration, or too high amperage, causing burn-through or excessive spatter. Always refer to the specific welding technique and material requirements.
Q: Can environmental conditions impact amperage settings for 7018 welding?
A: Yes, environmental factors such as wind and temperature can affect the amperage settings. In windy conditions, you may need to increase amperage to maintain a stable arc and prevent contamination.
Q: How do I adjust my welder for different positions using 7018 rods?
A: Different positions (flat, horizontal, vertical, overhead) may require adjustments in amperage and technique. Typically, you can reduce the amperage slightly for vertical and overhead positions to prevent excessive weld pool movement.
Q: What is the recommended travel speed for 7018 welding?
A: The recommended travel speed for 7018 welding varies but is usually around 4 to 10 inches per minute based on amperage settings. Consistency in travel speed helps maintain a uniform bead and proper penetration.
Q: Why is it important to maintain consistent amperage when welding with 7018 rods?
A: Maintaining consistent amperage is crucial for achieving uniform weld quality, ensuring proper penetration, and minimizing defects. Fluctuations can lead to inconsistent bead size and strength.
Q: How can I troubleshoot weld quality issues related to amperage?
A: If experiencing weld quality issues like undercutting or lack of penetration, check your amperage settings against the thickness of materials being welded. Also, ensure your travel speed is appropriate and maintain a steady hand during the weld.
These answers are structured to be informative and actionable, supporting readers in their welding practices. For further exploration of welding techniques and best practices, check the sections on “Factors Affecting Amperage Settings” and “Troubleshooting Weld Quality Issues Related to Amperage.”
The Way Forward
Finding the ideal amperage for your 7018 welding rod is crucial to achieving optimal weld quality and strength. Remember, using the correct settings not only enhances your welding effectiveness but also ensures safety and efficiency in your projects. Don’t let uncertainty hold you back-experiment with the parameters we discussed and see how they can elevate your welding work.
For more insights on welding techniques, check out our articles on choosing the right welding equipment and understanding different welding rods’ applications. If you’re eager to expand your knowledge even further, consider subscribing to our newsletter for tips straight from the experts, and explore our product pages for welding tools designed to deliver precision in every project. The journey to mastering welding doesn’t end here; keep learning and honing your skills for better results every time!