Installing a line voltage thermostat is a crucial step in optimizing your HVAC system’s efficiency and comfort, yet many homeowners hesitate to tackle it themselves. Did you know that a properly installed thermostat can reduce energy costs by up to 10%? By connecting your HVAC system to a line voltage thermostat, you can gain greater control over your heating and cooling needs, ensuring that your environment remains comfortable year-round. This guide will walk you through the installation process while emphasizing essential safety practices, common pitfalls, and best practices to empower you in your electrical project. Whether you’re a seasoned electrician or a DIY enthusiast, understanding how to effectively wire and install a line voltage thermostat will not only enhance your skill set but also improve your home’s energy efficiency. Let’s dive into the step-by-step process to ensure you’re connected right!
How Line Voltage Thermostats Work and Their Benefits

When it comes to effectively managing electric heating systems, understanding how line voltage thermostats operate is crucial. These devices control heating systems that utilize high voltage directly from the electrical line, typically at either 120 or 240 volts. Unlike low-voltage systems commonly found in HVAC configurations, line voltage thermostats connect directly to the heating appliances, such as baseboard heaters or radiant ceiling panels. This direct connection allows them to regulate power supply efficiently, ensuring that the desired temperature is maintained efficiently and effectively.
The benefits of using line voltage thermostats extend far beyond basic temperature control. Firstly, their simplicity leads to ease of installation and operation, making them an ideal choice for homeowners and electricians who favor straightforward solutions. Moreover, these thermostats often come with programmable features, allowing users to set schedules and optimize heating based on occupancy, thereby enhancing energy efficiency. By adjusting heating times and temperatures in accordance with daily routines, users can enjoy significant savings on energy bills while maintaining comfort. Additionally, many modern line voltage thermostats are now designed to be compatible with smart home systems, offering remote access via smartphones and other devices for ultimate flexibility and control.
Emphasizing safety, line voltage thermostats also adhere to specific regulatory standards that protect users from potential electrical hazards. Installation by certified professionals not only ensures compliance with local codes but also maximizes system performance. Ultimately, investing in a line voltage thermostat translates to an intuitive, cost-effective solution for maintaining a comfortable living environment in electric heating systems. As the industry continues to innovate, these devices remain pivotal in the management and efficiency of home heating.
Essential Tools and Materials for Installation
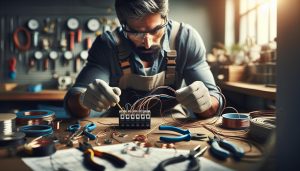
When preparing for the installation of a line voltage thermostat, having the right tools and materials on hand is crucial to ensure a smooth and efficient process. This preparation not only optimizes workflow but also adheres to safety standards, minimizing the risk of errors that could lead to electrical hazards. A well-equipped installation can be the difference between a straightforward setup and a frustrating experience fraught with complications.
To start, essential tools for this installation include:
- Screwdrivers: A set of flathead and Phillips screwdrivers for securing the thermostat to the wall and connecting wires.
- Wire Strippers: Necessary for trimming and stripping wire insulation cleanly, avoiding damage to the conductor.
- Pliers: For grasping and bending wires as needed during the connection process.
- Voltage Tester: A crucial safety tool to ensure that electrical power is off before beginning installation.
- Drill (optional): If new holes need to be made for mounting the thermostat, a drill can be handy.
- Tape Measure: To confirm proper placement and alignment of the thermostat.
- Level: Ensures that the thermostat is installed straight for aesthetic and functional accuracy.
In terms of materials, securing the right components can make for an efficient installation:
- Line Voltage Thermostat: This is the primary component, commonly available in both manual and smart models.
- Electrical Wire: Appropriate gauge wire should be used as per manufacturer specifications and local codes.
- Wire Nuts: Essential for securely connecting multiple wires together.
- Electrical Tape: Used for securing connections and providing an extra layer of insulation.
Having this toolkit ensures that electricians, whether seasoned professionals or DIY enthusiasts, are ready to tackle the installation of line voltage thermostats efficiently and safely. Proper equipment and materials not only enhance the installation process but also contribute to the longevity and performance of the heating system overall. By adhering to industry standards and best practices, installers can achieve a reliable setup that provides comfort and energy efficiency in the home heating system.
Step-by-Step Guide to Installing a Line Voltage Thermostat

To successfully install a line voltage thermostat, it’s essential to approach the task methodically, ensuring safety and efficiency throughout the process. Line voltage thermostats operate on 120V or 240V systems, making it crucial to work carefully to avoid any electrical hazards. Following a structured step-by-step plan will not only simplify the installation but also ensure a reliable and effective connection for your HVAC system.
Begin by turning off the power supply at the circuit breaker to prevent any risk of shock. Use a voltage tester to double-check that the wires are not live before proceeding. Once confirmed, remove the old thermostat from the wall, taking note of how the existing wires are connected. It’s advisable to label these wires with tape to avoid confusion later. Be careful while detaching the wires, as you’ll need them for your new thermostat installation.
Next, prepare the new line voltage thermostat for installation. Most thermostats will require you to connect wires to specific terminals, such as Line, Load, and Ground. Refer to the manufacturer’s instructions for exact wiring diagrams. Strip the wire insulation to expose enough copper to make solid connections-typically about half an inch. Use wire nuts to secure the connections, ensuring that no copper is exposed outside the nuts as this can cause short circuits.
With the connections made, mount the thermostat to the wall using screws and the level to ensure it is straight. Once securely attached, carefully tuck the wires back into the wall and reattach the thermostat cover. Finally, restore power at the circuit breaker and test the thermostat by adjusting the settings to ensure it activates the heating or cooling system accordingly. If everything looks good, monitor the system for a short time to ensure stable operation.
By adhering to these steps, you can confidently install a line voltage thermostat, enhancing your HVAC system’s performance and efficiency.
Common Mistakes to Avoid During Installation
When installing a line voltage thermostat, even a small oversight can lead to significant issues, ranging from inefficient temperature control to hazardous electrical conditions. One of the most common mistakes is failing to turn off the power at the circuit breaker before starting the installation. This can lead to dangerous electric shocks or short circuits. Always double-check with a voltage tester to ensure that the wires are de-energized before handling them.
Another frequent error is not carefully labeling the existing wires when removing the old thermostat. Without clear labels, you risk connecting the wires incorrectly, which can cause the thermostat to malfunction or not operate at all. A practical approach is to take a photo or use tape to mark each wire’s corresponding location. Additionally, using the wrong terminals for the connections can lead to overheating or system failure, so always refer to the manufacturer’s wiring diagram to ensure proper placement.
It’s also essential to use the right tools and materials. Using inadequate wire nuts or failing to secure the connections properly can leave exposed copper, leading to shorts or electrical fires. Ensure you have high-quality wire nuts and tools on hand, and while stripping wires, take care not to cut too deeply into the copper or insulation.
Lastly, many installers overlook the importance of securely mounting the thermostat. An improperly fitted thermostat can result in inaccurate readings and inconsistent heating or cooling. Use a level to ensure it is straight, and fasten it adequately to avoid future dislodging. By avoiding these common mistakes, you can ensure a safer and more effective installation of your line voltage thermostat.
Understanding Electrical Connections for Thermostats
Understanding the intricacies of electrical connections for thermostats is crucial for both safety and optimal functionality. A line voltage thermostat operates by completing a circuit, allowing power to flow to heating or cooling equipment based on temperature settings. Incorrectly connecting wires can not only prevent your system from functioning effectively but can also lead to hazardous electrical situations. Therefore, a solid understanding of how to properly make these connections is not just beneficial-it’s essential.
Before beginning the installation, it’s vital to consult and follow the manufacturer’s wiring diagrams, as different thermostats may have specific requirements. Typically, a standard line voltage thermostat will have connections labeled for “Line,” “Load,” and “Ground.” The Line connection brings power into the thermostat, Load sends power to the heating or cooling unit, while the Ground connection ensures safety by directing excess current away from the unit and into the ground. Familiarize yourself with these labels and verify that your wiring matches appropriately.
To establish safe and effective connections, follow these practical steps:
- Turn Off Power: Always shut off the power at the circuit breaker first. Use a voltage tester to double-check that the wires are de-energized before proceeding.
- Label Wires: If you’re replacing an older thermostat, label each wire with tape or take pictures to ensure proper reconnections. This mitigates risks of incorrect wiring, which can lead to malfunction.
- Secure Connections: Use appropriately sized wire nuts to secure each connection, ensuring there are no exposed copper strands. This helps prevent electrical shorts or potential fire hazards.
- Double-Check Polarities: Pay close attention to polarities as reversing them can impact thermostat performance. Confirm that the wiring corresponds with the terminal labels provided.
In today’s rapidly advancing technological landscape, understanding how these electrical connections work can also set the stage for future upgrades. For instance, if you consider shifting to smart thermostats, the foundational knowledge of electrical wiring will be invaluable. Smart thermostats often integrate with home automation systems, allowing for remote access and enhanced energy efficiency.
In conclusion, mastering the art of electrical connections holds significant relevance-not just for the immediate task of installing a line voltage thermostat but for advancing in the electrical field. Whether you’re an aspiring electrician or a seasoned professional, adhering to safety standards and practices ensures that your work upholds the highest quality and security in residential and commercial installations.
Troubleshooting Issues with Line Voltage Thermostats
When it comes to line voltage thermostats, several common issues can arise that may impede their operation or efficiency. Understanding how to troubleshoot these problems not only enhances the performance of your HVAC system but also showcases your expertise and commitment to quality work as an electrician. Among the most frequent issues are improper wiring, defective thermostats, and sensor malfunctions, each of which requires a systematic approach to diagnose and resolve.
One of the first steps in troubleshooting is verifying the wiring connections. It’s imperative to ensure that connections are secure and correspond exactly to the labels on the thermostat. A poor connection can lead to intermittent operation or complete failure. Begin by turning off the power and using a multimeter to check continuity of the wiring. If the connections appear intact, inspect the thermostat body for signs of damage or wear. A cracked casing or burnt scent indicates a likely need for replacement.
Another integral aspect is assessing the performance of the thermostat itself. If the HVAC system is not cycling as expected-instead running constantly or not turning on at all-this might suggest that the thermostat has malfunctioned. Test the thermostat by turning it up or down to see if the system responds accordingly. If it does not, replacing the unit may be necessary. Ensure to consult the manufacturer’s specifications for compatibility when selecting a new thermostat.
Finally, ensure that the temperature sensor is functioning correctly. If the readings appear inaccurate, it may be due to direct exposure to sunlight or drafts. Relocate the thermostat to a more neutral environment away from external influences. Proper placement greatly improves the efficiency of the thermostat, allowing for more precise temperature control and energy savings in the long run.
By taking these troubleshooting measures, you empower yourself with the skills and knowledge necessary to address common issues with line voltage thermostats effectively. Whether it’s a minor wiring mishap or a more significant equipment failure, a methodical approach to problem-solving ensures that you maintain high professional standards while optimizing HVAC performance for the benefit of your clients.
Upgrading to Smart Line Voltage Thermostats
presents a remarkable opportunity to enhance not only comfort but also energy efficiency in homes and businesses. These advanced devices allow users to control their heating systems remotely, adapt settings based on occupancy, and even utilize energy-saving mode features that traditional line voltage thermostats lack. By integrating Wi-Fi capabilities, smart thermostats facilitate real-time adjustments and monitoring from smartphones or tablets, leading to significant cost savings on energy bills.
When considering an upgrade, it’s essential to evaluate compatibility with your existing HVAC system. Most smart line voltage thermostats are designed to work seamlessly with electric heating systems; however, checking the specifications and installation requirements is vital. Potential users should also consider models featuring learning algorithms that adjust settings based on user habits, dramatically increasing operational efficiency. For instance, if a user typically leaves home at a specific time, a smart thermostat can learn this behavior and adjust the heating schedule accordingly, ensuring comfort when needed without wasting energy.
Features to Consider in Smart Thermostats
- Wi-Fi Connectivity: Enables remote control through mobile devices.
- Energy Reports: Provides insights into usage and suggests adjustments for saving energy.
- Voice Assistant Integration: Offers hands-free control via smart home systems like Amazon Alexa or Google Assistant.
- User-Friendly Interface: A touchscreen display can enhance interaction and usability.
The installation of smart line voltage thermostats is generally straightforward for those familiar with electrical connections, but it’s crucial to follow detailed instructions and ensure proper wiring. While upgrading, maintaining safety standards and regulations is paramount. Electricians must also stay abreast of any certifications related to smart home technologies, ensuring they can legally and efficiently facilitate these installations.
With the rise of smart home technologies, the demand for skilled electricians who can install and troubleshoot these devices is increasing. As they provide not only comfort but also energy efficiency, making this upgrade can lead to career advancement for electricians equipped with the necessary knowledge and skills. Investing in continuous education and training in smart technologies is a strategic career move, fostering growth in a field that increasingly merges traditional practices with cutting-edge innovations.
Maintenance Tips for Line Voltage Thermostats
Maintaining line voltage thermostats is crucial for ensuring optimal heating performance and energy efficiency in your system. Regular checks and minor adjustments can significantly prolong the lifespan of your thermostat and improve the overall efficiency of your heating system. For instance, consider cleaning the thermostat and its sensors regularly to prevent dust accumulation, which can impede functionality. Dust can act as an insulator, leading to inaccurate readings and inefficient heating cycles.
Another vital maintenance task is to adjust the thermostat settings seasonally. As the seasons change, modifying your thermostat to align with your desired temperature and comfort levels can help optimize energy use. Taking advantage of the programming features (if available) can allow for automated adjustments that suit your lifestyle, enhancing comfort and minimizing waste.
Common :
- Regular Cleaning: Dust the inside and exterior of the thermostat to ensure that sensors read temperatures accurately.
- Check Connections: Occasionally inspect electrical connections for looseness or signs of wear, ensuring a secure connection to prevent overheating.
- Test Operation: Periodically test the thermostat to confirm it is responding correctly to adjustments. A few simple temperature changes can help ensure it operates as expected.
- Consult the Manufacturer’s Manual: Follow specific maintenance guidelines from the manufacturer for your thermostat model, as recommendations can vary.
Neglecting these maintenance tasks can lead to unnecessary strain on your heating system, resulting in potentially costly repairs down the line. For electricians, emphasizing the importance of regular maintenance to clients not only serves as good customer service but also solidifies your reputation as a knowledgeable professional in HVAC systems. Keeping abreast of modern technologies, such as smart thermostats, is equally important as these devices often include maintenance alerts, ensuring users are informed when action is required.
By instilling these best practices, both homeowners and electricians can contribute to a more efficient and effective heating environment. A well-maintained line voltage thermostat not only enhances comfort but also drives down energy costs, making it a win-win for everyone involved.
Frequently Asked Questions About Line Voltage Thermostats
Line voltage thermostats are critical components in managing heating systems, but many users frequently have questions about their operation and best practices. Understanding these devices can help inform maintenance and installation strategies, as well as enhance efficiency in heating applications.
One common concern is whether line voltage thermostats can be used in conjunction with other heating systems. Generally, these thermostats are compatible with electric baseboard heaters, radiant heating systems, and some forced air systems. However, it’s essential to ensure that the thermostat’s voltage rating matches the heating element to prevent damage or malfunction.
Another frequently asked question revolves around energy efficiency. Users often wonder if line voltage thermostats are more energy-efficient than their low voltage counterparts. While both types have their advantages, line voltage thermostats can be more straightforward in operation, particularly in direct heating applications. They typically provide a more responsive heating experience because they directly control the heating elements without the need for additional transformers or relays.
For homeowners considering upgrades, the question arises about transitioning to smart thermostats. Smart line voltage thermostats offer features like app control, learning algorithms, and programmable settings that can further enhance energy efficiency. These advanced models can adapt to your schedule and preferences, reducing energy waste when you’re away and optimizing comfort when you’re home. However, installation may require additional considerations, such as ensuring compatibility with your existing electrical systems.
Maintenance is another topic of concern. Many users are unsure how often they should check their line voltage thermostats. Regular cleaning and inspection of electrical connections are paramount; a schedule of at least twice a year can help maintain optimal performance. Additionally, ensuring that the thermostat’s location is free from obstructions and away from drafts can help maintain accurate readings and efficient operation.
In summary, understanding line voltage thermostats not only aids in effective installation and maintenance but also empowers users to make informed choices regarding upgrades and energy efficiency. With careful attention to compatibility and performance, these devices can significantly enhance the effectiveness of heating systems while potentially reducing energy costs.
Regulatory Considerations and Best Practices
Understanding the associated with installing line voltage thermostats is essential for ensuring both safety and functionality. These devices operate at higher voltages and, as such, must comply with various electrical codes and standards. The National Electrical Code (NEC), for example, outlines specific guidelines regarding wiring, circuit breakers, and safety measures that must be adhered to during installation. Failing to comply with these regulations can result in hazardous conditions, equipment damage, or legal repercussions.
When installing line voltage thermostats, following best practices not only enhances the safety and efficiency of the installation but also promotes career advancement for electricians. Key practices include:
- Verify Compatibility: Ensure that the thermostat is compatible with the heating system’s voltage and type. Most residential line voltage thermostats are designed for 120V or 240V systems.
- Use Correct Wiring: Utilize appropriate gauge wiring as specified in the NEC, taking into account the amperage that will flow through the circuit. Always refer to load calculations to determine the proper wire size.
- Install with Safety Protocols: Always turn off power at the circuit breaker when working on electrical installations. Use insulated tools and wear personal protective equipment (PPE) as an added precaution.
- Conduct Regular Inspections: After installation, regular inspections of the electrical connections and thermostat performance can prevent potential failures and ensure longevity.
Moreover, electricians should stay informed about changes in regulations and advancements in technology. For instance, the increasing adoption of smart line voltage thermostats introduces new standards focusing on energy efficiency and connectivity. Ensuring compliance with these modern standards can enhance an electrician’s marketability and improve customer satisfaction.
In summary, being diligent about regulatory considerations and implementing industry best practices when installing line voltage thermostats not only promotes safety and efficiency but also supports professional growth in the electrical field. By staying current with regulations and committed to best practices, electricians can deliver superior service and secure their reputation in a competitive market.
Comparing Line Voltage vs. Low Voltage Thermostats
When it comes to choosing between line voltage and low voltage thermostats, understanding their key differences can significantly impact your HVAC efficiency, safety, and overall installation costs. Line voltage thermostats operate at higher voltages, typically 120V or 240V, making them suitable for direct control of electric heating systems, such as baseboard heaters and electric furnaces. Conversely, low voltage thermostats, usually designed for 24V systems, are more commonly used with central heating and cooling systems, including furnaces and heat pumps.
One major advantage of line voltage thermostats is their straightforward installation: they connect directly to the heating element, often without the need for a separate transformer. This can simplify the setup for electricians and can be beneficial in situations where electric heating is predominant. However, the higher voltage levels necessitate strict adherence to safety protocols and local electrical codes, as improper handling can lead to hazardous conditions.
On the other hand, low voltage thermostats are generally safer and provide better control over the HVAC systems, offering more features such as programmable scheduling and smart connectivity options. These thermostats require a transformer to step down voltage but allow for greater flexibility in system integration. As energy efficiency becomes increasingly vital, many low voltage models come with advanced features that can optimize performance and reduce energy consumption.
Whether an electrician decides to install a line voltage or low voltage thermostat often depends on the specific heating and cooling system configuration. It’s essential to assess system compatibility, potential energy savings, and installation complexity to make the best choice for the application. Ultimately, understanding the distinctions between these types is crucial for delivering tailored HVAC solutions that maximize both performance and safety in various settings.
Q&A
Q: What tools do I need to install a line voltage thermostat?
A: To install a line voltage thermostat, you will typically need a screwdriver, wire strippers, a voltage tester, pliers, and electrical tape. These tools will help ensure a safe and effective installation, as outlined in the “Essential Tools and Materials for Installation” section of our main article.
Q: How do I know if my thermostat is line voltage or low voltage?
A: To determine if your thermostat is line voltage, check the wiring. Line voltage systems generally have two or more heavy gauge wires (typically 120V or 240V), while low voltage systems use thinner wires and are usually rated at 24V. Consult the “Understanding Electrical Connections for Thermostats” section for more details.
Q: Can I install a line voltage thermostat myself?
A: Yes, you can install a line voltage thermostat yourself if you have basic electrical knowledge and tools. However, if you are unsure or inexperienced, it’s advisable to hire a qualified electrician for safety. Refer to our “Step-by-Step Guide to Installing a Line Voltage Thermostat” for detailed instructions.
Q: How do I troubleshoot a line voltage thermostat?
A: Troubleshooting a line voltage thermostat typically involves checking power supply, inspecting wiring connections, and testing the thermostat’s functionality with a multimeter. The “Troubleshooting Issues with Line Voltage Thermostats” section in our article provides thorough insights on resolving common problems.
Q: What are the differences between line voltage and low voltage thermostats?
A: Line voltage thermostats control systems using higher voltage (120V or 240V), making them simpler to install. In contrast, low voltage thermostats are part of a more complex HVAC system and usually require a power transformer. For a detailed comparison, see our “Comparing Line Voltage vs. Low Voltage Thermostats” section.
Q: When is it necessary to upgrade to a smart line voltage thermostat?
A: Upgrading to a smart line voltage thermostat is beneficial when seeking greater energy efficiency, remote control, or advanced features like scheduling. Evaluate your home’s heating needs and consider enhancements detailed in the “Upgrading to Smart Line Voltage Thermostats” section for more insights.
Q: What common mistakes should I avoid during installation?
A: Common mistakes to avoid during installation include not turning off power before working, improper wiring connections, and failing to follow manufacturer instructions. Our section on “Common Mistakes to Avoid During Installation” offers critical tips to ensure a successful setup.
Q: How often should I maintain my line voltage thermostat?
A: You should perform maintenance on your line voltage thermostat at least once a year. This includes cleaning, checking connections, and testing functionality to ensure optimal performance. For maintenance tips, refer to the “Maintenance Tips for Line Voltage Thermostats” section of our article for a comprehensive guide.
Insights and Conclusions
Now that you’ve mastered the installation of a line voltage thermostat, you’re one step closer to optimizing your HVAC system for improved efficiency and comfort. Remember, the right thermostat setup not only saves energy but enhances your home’s climate control, making it essential for any property owner. Don’t forget to check our detailed guides on thermostat types and how to maintain HVAC systems for ongoing success.
If you’re eager to dive deeper into related topics, consider exploring our articles on energy-efficient home upgrades or our comprehensive overview of smart home technology. Also, be sure to subscribe to our newsletter for expert tips and updates directly to your inbox!
Ready to take the next step? Connect with our team of professionals for personalized consultations or browse our product pages for the latest in HVAC technology. Your perfect home environment is just a click away-let’s keep the conversation going!